Training and Gear Information
Occasionally people ask me if I do any special training for these quests. The simple answer is I don’t really do any task-specific training at all. The more nuanced answer is that I am a gym rat – always have been and always will be. I go to the gym 4-6 days a week to work out. On weekends I am usually golfing, biking, hiking, skiing or doing something else with some athletic component to it.
Up until 2013 when I finished the AT, I lifted weights and did some light cardio. Maybe 15-30 minutes on the stairmaster or walking fast on a treadmill. In preparation for Mt. Denali, I hired a personal trainer for 30 minute sessions 4 days a week to help revamp my lifting workouts a bit. We worked out for a few months and I was more focused on my back as I would be carrying 50+ pound packs and pulling a sled with more gear.
Up until 2013 when I finished the AT, I lifted weights and did some light cardio. Maybe 15-30 minutes on the stairmaster or walking fast on a treadmill. In preparation for Mt. Denali, I hired a personal trainer for 30 minute sessions 4 days a week to help revamp my lifting workouts a bit. We worked out for a few months and I was more focused on my back as I would be carrying 50+ pound packs and pulling a sled with more gear.
Sometime around Fall 2015 I started using Jen Zuba as my trainer one day a week for an hour. I also started going to her fitness classes Friday mornings. These are radically different workouts from the weightlifting workouts I have done all my life. Typically there are 4 exercises that are done for 30-45 seconds each with no rest except to get to the next exercise. You repeat these exercises four times. After a break, you do a different 4-5 exercises for another four cycles. Repeat until the hour is filled up. These workouts use minimal weights, sometimes dumbbells or lat pulldown machines, and sometimes you throw or bang a weighted ball. The rest is mostly using your own body-weight for pushups or planks, etc.
Her website is here if you want more information:
http://somelikeitfit.comHer website is here if you want more information:
So, as far as sport-specific workouts, I really don’t do any…I mostly just workout like I always do.
A number of weeks before I was serious about doing the AT, I found a spreadsheet online that I liked. It had some recommended target weights for equipment and you could also put your gear weights in there to compare. Unfortunately I don’t remember where I got it so I can’t properly credit the person that originally made it. However, I did made very extensive modifications to it to expand it. I am an engineer so this is the stuff I enjoy!
Anyway, I bought a postal scale and weighed every single piece of gear I had and also started a list of things I needed to get. If you look over the list you will see I am NOT an ultra-light backpacker. I know there are many areas I can cut down still to bring the weight down. As one example, my backpack is almost 5 pounds. However, I tried a number of packs on and ultimately went with the Osprey Aether 70 as it was more comfortable than some of the others ones. In addition, I was going to be living out of this pack for months and wasn’t sure how any pack would hold up.
Anyway, I bought a postal scale and weighed every single piece of gear I had and also started a list of things I needed to get. If you look over the list you will see I am NOT an ultra-light backpacker. I know there are many areas I can cut down still to bring the weight down. As one example, my backpack is almost 5 pounds. However, I tried a number of packs on and ultimately went with the Osprey Aether 70 as it was more comfortable than some of the others ones. In addition, I was going to be living out of this pack for months and wasn’t sure how any pack would hold up.
Below are a couple pictures of my pack. That is what I used for 5 months to carry everything I needed. Usually you would go into a town every 3-8 days to resupply so the pack needs to be able to carry 3-8 days of food. Also, if you are hiking the Pacific Crest Trail, there are a number of sections in southern CA that have waterless sections for over 20 miles. So, you need to also be able to carry sufficient water to get to the next water source.


The next two pictures show my tents. On the AT, I used the orange Big Agnes Scout UL2. This is a two-person tent that has plenty of room for myself and all my gear. It also has pretty good headroom which was helpful in the morning when I was cleaning up, putting my contacts in and getting my gear ready. The other advantage is you use your trekking poles to support it. This saves you from carrying extra weight. The biggest downside is the tent is single-walled which means there is no rainfly on top. When it rained, it could get damp inside pretty easily. Not being a free-standing tent was the other downside. I think there were 11-12 stakes to properly support the tent, especially if it was windy out. This was a pain to stake out sometimes.
The other pictures is the MoTrail Tarptent. I bought this one for the Pacific Crest Trail to try something a little different. This tent was very roomy but I was never comfortable setting it up. It was also single-walled which is a drawback and it also required a bunch of stakes to properly get it to stand. Like the Big Agnes tent, it uses your trekking poles to support it. This was great until I broke the tip off on one of my trekking poles. It would not longer fit in the grommet which made it difficult every night to set up the tent. I had to use some goofy workarounds to get it to stand at all.
For any future long-distance hiking, I will probably buy a 2-man, free-standing tent. I am not sure what it will be yet but I also have no hiking plans at this time either.
For any future long-distance hiking, I will probably buy a 2-man, free-standing tent. I am not sure what it will be yet but I also have no hiking plans at this time either.


When you move from long-distance hiking to bigger mountain expeditions, the gear requirement changes fairly drastically. While there is a bunch of hiking gear you can reuse, there is also a lot more rigorous need for extra gear and gear that is usable in temperatures well below zero.
I was not skilled at all in mountain expeditions so I go with a guiding company on any big mountains like Mt. Denali, Mt. Aconcagua, etc. These companies do a good job of getting you the information you need for gear. I took at Denali Prep Course from American Alpine Institute in Bellingham, WA. I ended up purchasing a bunch of new gear for that 5-6 day trip and then purchased more gear in preparation for Mt. Denali itself. One of the requirements is to be prepared for temperatures up to 40 below zero.
I was not skilled at all in mountain expeditions so I go with a guiding company on any big mountains like Mt. Denali, Mt. Aconcagua, etc. These companies do a good job of getting you the information you need for gear. I took at Denali Prep Course from American Alpine Institute in Bellingham, WA. I ended up purchasing a bunch of new gear for that 5-6 day trip and then purchased more gear in preparation for Mt. Denali itself. One of the requirements is to be prepared for temperatures up to 40 below zero.
At higher elevations and colder temperature you may be required to wear up to five layers of clothing. You may also have 3-4 different pairs of gloves depending on the conditions. As another example, whereas on the AT or PCT you can get away with a 40-70 liter backpack, on an expedition you will need a 100 liter pack as a minimum. You will be carrying a lot more gear and it will be a much heavier pack.
Needless to say, the gear requirement ratchets up quickly and can get pretty expensive. Below is a shot of my Denali gear laid out.
Below is a shot of my Denali gear laid out. On the left, five layers for the legs. On the right, five layers for the torso.
Needless to say, the gear requirement ratchets up quickly and can get pretty expensive. Below is a shot of my Denali gear laid out.
Below is a shot of my Denali gear laid out. On the left, five layers for the legs. On the right, five layers for the torso.


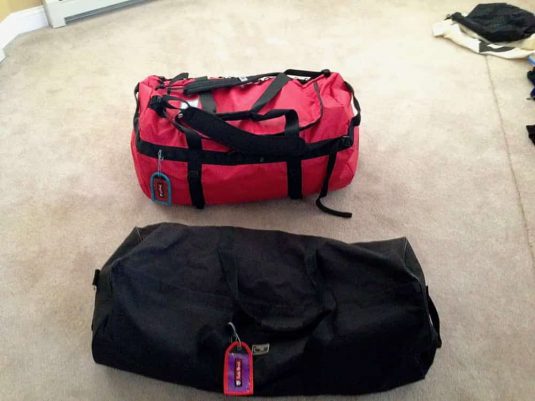
Below left is most of my gear exploded out. Below right is what everything packs down to.

You can download my gear spreadsheet here – click on the button. If it doesn’t work for you, feel free to send me an email on the contact page and ask for it.
